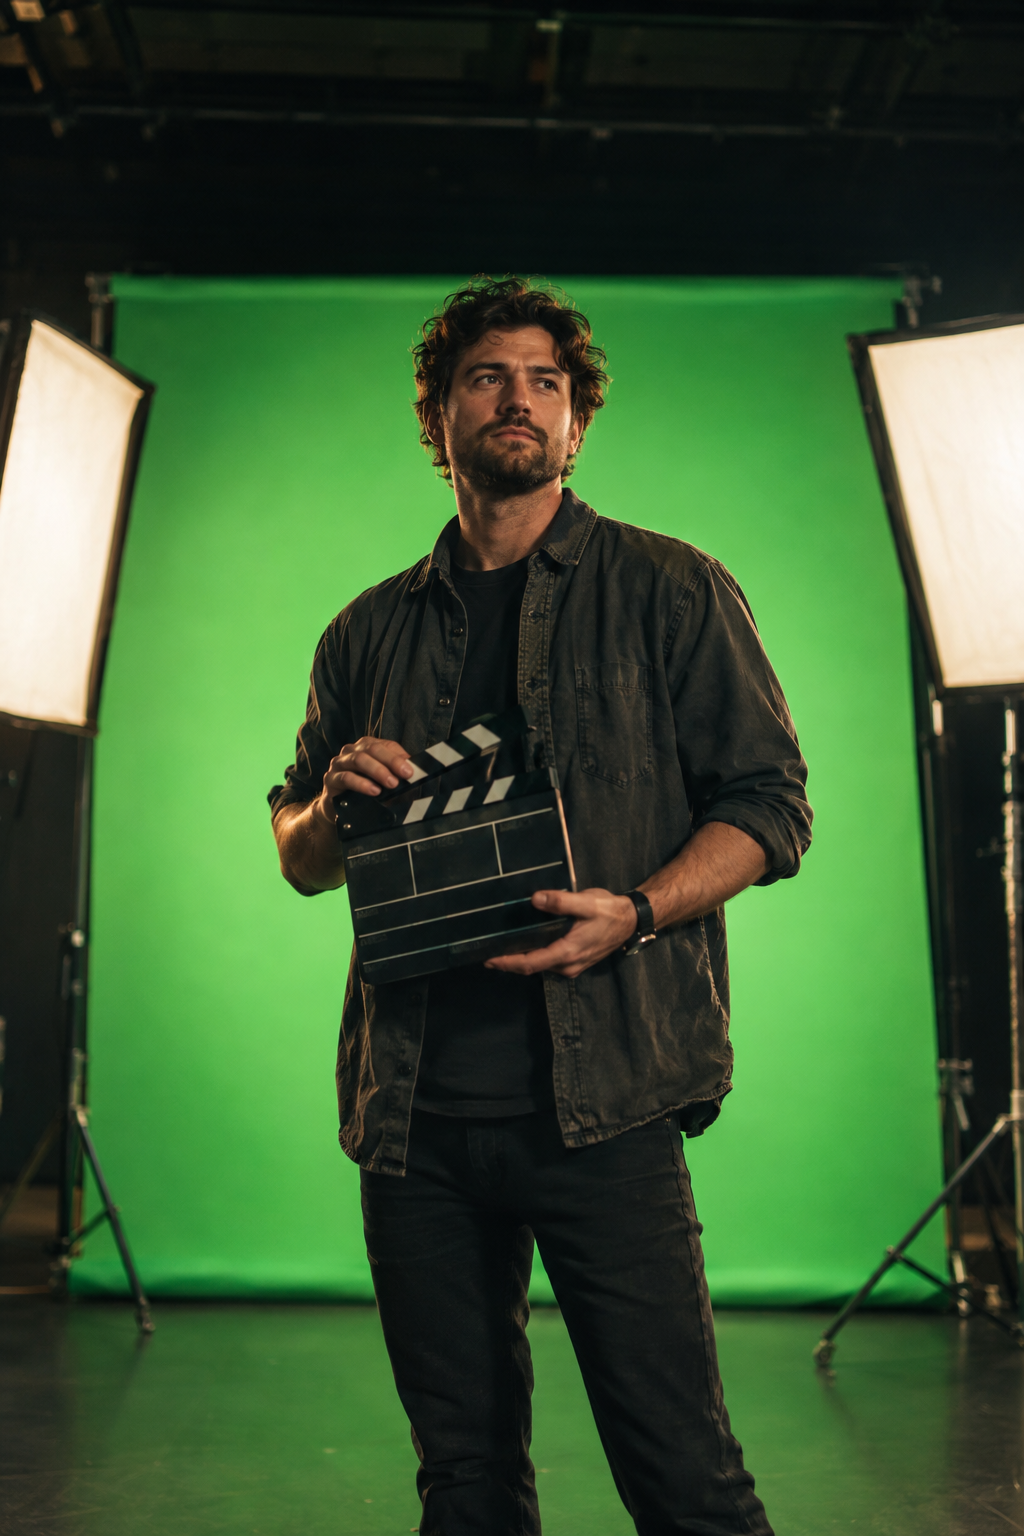
When Sam Raimi shot Spider-Man in 2002, the crew keyed the hero against green screens and the Green Goblin against blue, because a green villain would have vanished into a green wall. That one production choice tells you most of what a chroma key green screen is about. You pick a colour your subject isn’t wearing, light it evenly, and let software swap every pixel of that colour for whatever background you like.
Key Takeaways
- Chroma keying replaces one colour in your footage with a new image or video. Green is the default because camera sensors capture it cleanly and few people wear it.
- Even lighting on the screen matters more than the screen itself. A wrinkled bedsheet lit flat will key better than a pro backdrop lit badly.
- Keep your subject 6 to 10 feet in front of the screen to cut green spill on hair and shoulders.
- Shoot 4:2:2 or better if your camera allows it. 4:2:0 footage from phones still works, but edges get chunkier.
- Free tools like DaVinci Resolve, OBS Studio and CapCut pull usable keys. Paid tools like After Effects mostly buy you better edge control.
- Export with an alpha channel (ProRes 4444, PNG sequence or WebM) if you want the keyed clip to drop into another project.
How Chroma Key Actually Works
Your software looks at every pixel and asks one question. Is this colour close enough to the key colour to count as background?
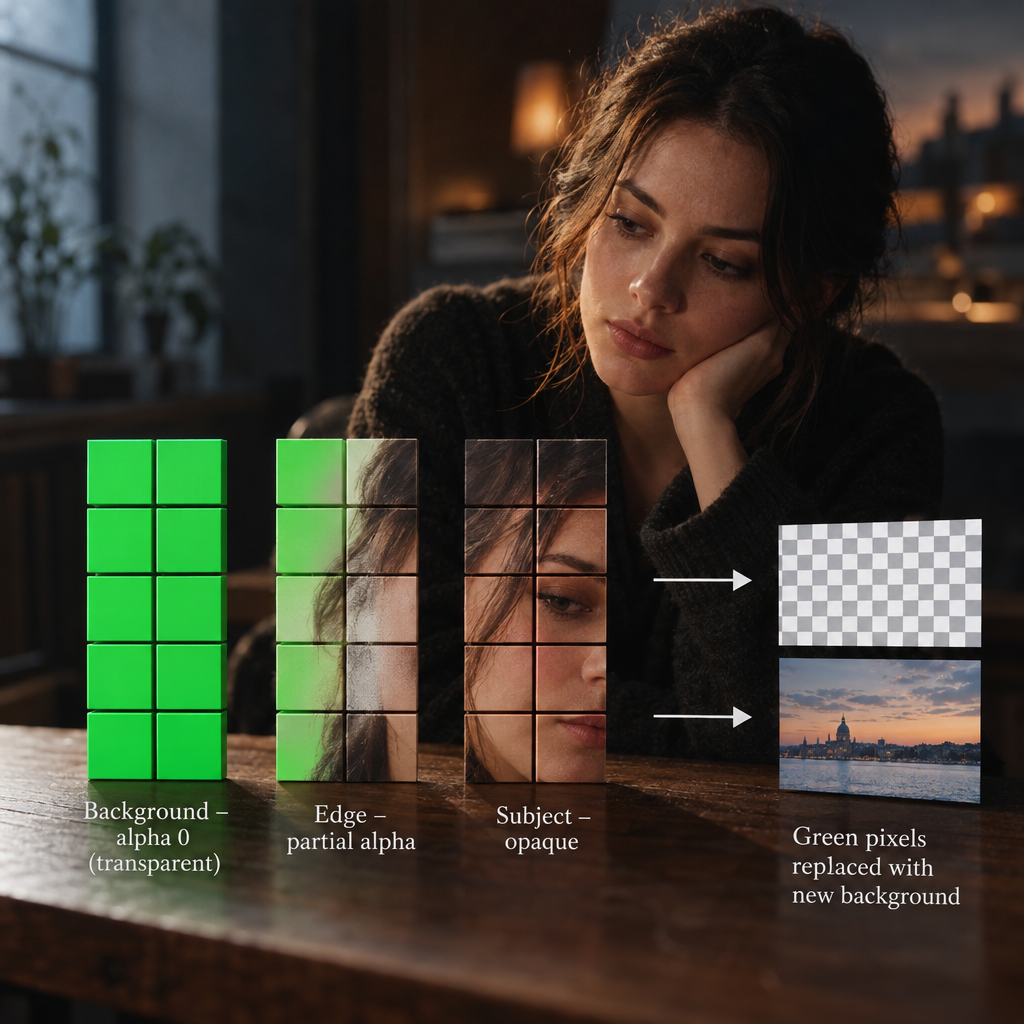
Pixels that match get their alpha, their transparency value, set to zero. Pixels that don’t match stay opaque. Pixels on the border, like wispy hair or motion blur, get a partial value.
That partial zone is where all the trouble lives. A hard edge looks like a cardboard cutout. A soft edge that eats into the subject looks like a bad weather forecast.
Modern keyers don’t just match a single colour. They analyse the screen as a range of hues, saturations and brightness levels, which is why an evenly lit screen is so important. The narrower the range the software has to remove, the less it accidentally removes from your subject.
Green Screen or Blue Screen?
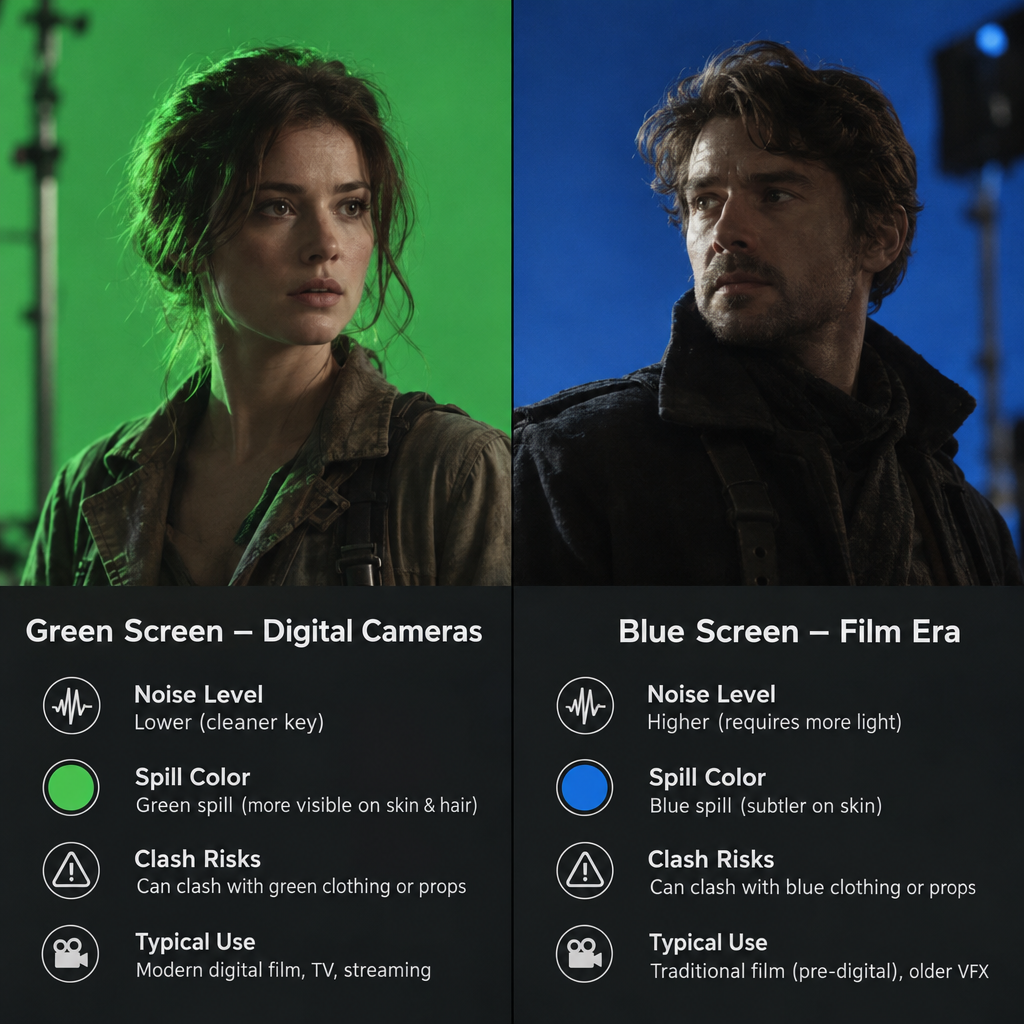
Hollywood used blue for decades. Larry Butler’s blue-screen travelling matte work on The Thief of Bagdad (1940) won the Academy Award for Special Effects, and blue stayed the standard through Star Wars (1977) at Industrial Light & Magic.
Green took over as digital cameras replaced film. A Bayer-pattern sensor has twice as many green photosites as red or blue, so green channels carry less noise and more detail.
| Factor | Green screen | Blue screen |
|---|---|---|
| Light needed | Less; green is brighter | More; blue absorbs light |
| Sensor noise (digital) | Lower in the green channel | Higher in the blue channel |
| Spill visibility | Obvious, greenish rim on skin and hair | Subtler, reads as cool shadow |
| Clash risk | Green clothing, plants, some eyes | Denim, blue eyes, night scenes |
| Typical use today | Most video, streaming, VFX | Night shots, blonde hair, green costumes |
Pick green unless your subject is wearing it. Blonde and light hair sometimes keys better against blue because green spill shows strongly in pale strands.
The Gear You Need (and What It Costs)
You can start for the price of a bedsheet. You can also spend thousands. Here is what actually changes the result.
| Item | Budget option | Step up | What it changes |
|---|---|---|---|
| Screen | Green fabric or muslin, roughly $20 to $40 | Collapsible pop-up frame (Elgato, Neewer), roughly $100 to $170 | Wrinkles and shadows; pop-ups stay flat |
| Screen lighting | Two LED panels or softboxes at 45 degrees | Four lights plus a flag to control spill | Evenness across the screen |
| Subject lighting | One key light, one hair light | Full three-point setup | Separation from background |
| Camera | Phone with locked exposure | Mirrorless with 10-bit 4:2:2 | Edge quality and colour banding |
| Monitoring | Phone screen | Waveform or false colour on an external monitor | Spotting hot spots and shadows before you shoot |
Chroma green paint is another route for a permanent studio. Rosco’s DigiComp line is the industry pick, though any matte paint matched to a chroma green swatch works for home setups.
Matte is the key word. Any sheen creates highlights, and highlights key out as holes.
Setting Up and Lighting the Screen
Hang the screen as flat as you can. Clamps on a frame beat drawing pins in a wall. Steam or iron fabric screens, because every crease is a shadow and every shadow is a slightly different green.
Light the screen separately from your subject. Two lights, one each side, aimed at 45 degrees, will cover a 10-foot screen evenly. Walk the edges with your camera’s waveform or false colour and look for dips.
Aim for a flat, mid-grey exposure on the screen. On a waveform that means the green sits in a tight band somewhere around 40 to 60 percent, with no spikes.
Now light your subject. A backlight or hair light from behind and above does two jobs. It separates the subject from the screen, and it burns through any green spill on the edges of hair and shoulders.
Keep the subject’s lighting slightly brighter than the screen. A screen that outshines the person throws green back onto them from every direction.
Match the look of your final background too. If you plan to drop in a sunset, light your actor warm from the side. Nothing gives away a composite faster than lighting that comes from the wrong direction.
Camera Settings That Make or Break the Key
Chroma subsampling decides how much colour information your camera keeps. Keying is colour work, so this setting matters more than resolution.
| Subsampling | What it keeps | Typical cameras | Keying result |
|---|---|---|---|
| 4:2:0 | Colour at quarter resolution | Phones, most consumer mirrorless in 8-bit | Blocky edges on hair; workable with soft matte |
| 4:2:2 | Colour at half horizontal resolution | Sony a7 IV, Panasonic GH6, Canon R5 in 10-bit modes | Clean edges, good for most projects |
| 4:4:4 | Full colour resolution | Blackmagic cameras in ProRes 4444, RAW formats, Atomos recorders | Best possible matte, fine hair strands survive |
Other settings worth locking down:
- Shutter speed. Use a 180-degree shutter (1/50 at 25fps, 1/60 at 30fps). Faster shutters cut motion blur, which helps the key but looks staccato.
- Aperture. Stop down enough that the subject stays sharp. Soft focus on the subject blends green into edges.
- ISO. Keep it low. Noise in the green channel becomes flicker in the matte.
- White balance. Lock it. Auto white balance shifts the green value shot to shot.
- Sharpening. Turn in-camera sharpening down or off. Halos around edges key badly.
Shoot at the highest bitrate your camera offers. Heavily compressed footage smears the boundary between subject and screen.
Directing Your Subject
Wardrobe comes first. No green, no reflective jewellery, no glasses if you can avoid them. Glasses reflect the screen, and that reflection keys out as a hole in someone’s face.
Distance is next. Six feet minimum between subject and screen, ten if the room allows it. Spill falls off quickly with distance.
Movement needs planning. If your actor walks, they need to stay within the lit area. Mark the floor with tape.
Eyelines matter in the final shot. Give the actor a reference, like a C-stand or a taped X, where the thing they are reacting to will appear.
Fast hand movements cause motion blur that mixes green into the edges. If you can slow a gesture slightly without hurting the performance, do it.
Pulling the Key: Software Compared
Every serious editor ships a keyer. The differences are in edge control, spill suppression and how much hand-holding you get.
| Software | Keyer | Cost (as of this writing) | Best for |
|---|---|---|---|
| DaVinci Resolve | 3D Keyer (colour page), Delta Keyer (Fusion) | Free; Studio version $295 one-time | Free professional-grade keying |
| Adobe After Effects | Keylight 1.2 | Subscription, roughly $22.99/month on an annual plan | Hair, fine detail, VFX shots |
| Adobe Premiere Pro | Ultra Key | Same subscription tiers as After Effects | Fast keys inside an edit |
| Final Cut Pro | Keyer | $299.99 one-time | Mac editors who want automatic first passes |
| OBS Studio | Chroma Key filter | Free | Live streaming and recording |
| CapCut | Chroma Key | Free tier; Pro subscription for some effects | Phone and desktop social video |
Ultra Key in Premiere is the fastest starting point for beginners. Select the eyedropper, click a clean patch of green, and you have a rough matte in seconds.
Keylight in After Effects rewards time. The Screen Gain and Screen Balance controls let you push the matte without chewing through hair, and the Screen Matte section has separate clip black and clip white sliders for tightening the core.
Resolve’s Delta Keyer in Fusion matches After Effects for quality at zero cost. The learning curve is steeper because Fusion uses node graphs rather than layers.
Most keyers follow the same sequence:
- Select the key colour with an eyedropper on a clean, well-lit patch.
- Widen the tolerance until the whole screen disappears, then back off slightly.
- Tighten the matte with black and white clip controls.
- Add a garbage matte to remove stands, floor and edges of the screen.
- Apply spill suppression to pull green out of skin and hair.
- Soften or choke the edge by a pixel or two.
View the matte as black and white while you do steps 2 and 3. Every keyer has a matte or alpha view. Pure black background, pure white subject, soft grey only on hair and blur.
Keying Online and on Your Phone
Browser tools have improved a lot. VEED, Kapwing and Microsoft’s Clipchamp all include a chroma key feature, and the basic flow is the same everywhere. Upload your clip, select the green with an eyedropper, adjust a sensitivity slider, drop in a new background and export.
They work well for talking-head videos, product clips and social content. They struggle with hair, motion blur and anything shot on a phone in 4:2:0 with uneven light.
Free tiers usually watermark the export or cap resolution. Check before you spend an hour on a project.
AI background removers like Unscreen and Runway take a different approach. They detect the person rather than a colour, so no green screen is needed. The edge quality is behind a good chroma key on properly lit footage, but for a quick cutout they beat fighting with a wrinkled sheet.
For still images, Photoshop’s Select Subject and Remove Background do the same job. Canva and Photopea offer free equivalents. Save the result as a PNG to keep transparency.
Logos and graphics on green are a common request. If someone sends you a logo on a green background rather than a transparent PNG, a chroma key removes it, but anti-aliased edges will carry a green fringe. Ask for the vector or transparent file instead whenever you can.
Fixing Spill, Edges and Hair
Spill is green light bouncing off the screen onto your subject. Almost every keyer has a spill suppressor. It finds pixels leaning green and pulls them towards neutral.
Push it too far and skin goes magenta. Dial it back until the edges look neutral but skin still looks like skin.
Edge problems come in two flavours. Chattering edges flicker between frames and usually mean noisy footage or a matte clipped too hard. Soften the matte and raise the black clip less aggressively.
Dark halos mean the matte is too tight and is eating into the subject. Choke the matte outward slightly or lower the white clip.
Hair is the hardest case. Keylight and Delta Keyer both let you key the hair with a soft, loose setting and the body with a tight one, then combine them. Rotoscoping a quick core matte of the body and letting the keyer handle only the hair edge is the standard VFX move.
If hair refuses to cooperate, a backlight at the shoot would have saved you. Write that down for next time.
Replacing the Background Convincingly
A clean key is half the job. The other half is making the new background and the subject look like they share a space.
Match the colour grade. Pull the subject’s blacks and whites to the same levels as the background. If the background is warm, warm the subject.
Match the grain. Clean keyed footage over a grainy plate looks pasted on. Add a light grain layer over the whole composite so both share the same texture.
Match the depth of field. If the background was shot or rendered with shallow focus, blur it to taste. If your subject has a crisp edge against a soft plate, add a pixel of edge blur.
Add contact. A subtle shadow under the feet or a faint light wrap from the background onto the subject’s edges does more than any amount of edge tweaking.
Light wrap is worth learning early. It samples the background colour and bleeds a small amount onto the subject’s outline. Most keyers include it, and Resolve’s Fusion has a dedicated node.
Exporting With Transparency
If you want the keyed clip to drop into another project, export with an alpha channel. Standard H.264 MP4 cannot hold transparency. Your background will come back as black.
Formats that carry alpha:
- Apple ProRes 4444. The professional default. Large files, perfect quality, reads in every major editor.
- PNG sequence. One lossless image per frame. Bulky but bulletproof for short clips and animations.
- WebM (VP9) with alpha. Smaller files, works in browsers and OBS, less universal in editors.
- GIF or APNG. Only for tiny, low-colour clips.
Tick the alpha or “include transparency” box in your export settings. Premiere calls it Render at Maximum Depth with the 4444 codec. Resolve has an Export Alpha toggle under Advanced Settings.
For still frames, export PNG-24 with transparency. JPEG has no alpha channel.
From Mary Poppins to The Mandalorian
Chroma keying has a long paper trail. Frank Williams patented a travelling matte process in 1918, and Butler’s blue-screen work on The Thief of Bagdad made the technique practical for colour film in 1940.
Petro Vlahos solved the fringing problem with his sodium vapour process, which lit the background with a narrow band of yellow light that a prism could separate from the actors. Disney used it for the animated-dancing-penguins sequence in Mary Poppins (1964), and Vlahos received an Academy Award for technical achievement for the work. Mary Poppins streams on Disney+.
Blue screen dominated the 1980s and 1990s. The light cycles of Tron (1982) and the space battles of the original Star Wars trilogy were composited optically, with every layer printed onto film.
Digital keying arrived in the late 1990s and green took over. Kerry Conran’s Sky Captain and the World of Tomorrow (2004) and Robert Rodriguez’s Sin City (2005) shot almost entirely on screens, with actors performing against nothing. Zack Snyder’s 300 (2006) followed the same playbook in a Montreal warehouse. All three are available to rent or buy on digital stores including Apple TV and Amazon.
Then the screen itself started to disappear. ILM’s StageCraft system, nicknamed the Volume, surrounded the cast of The Mandalorian (2019) with a curved LED wall that displayed the digital environment in real time. Actors could see the planet they were standing on, reflections appeared naturally in Mando’s armour, and the lighting on faces came from the environment itself. Every season of the series streams on Disney+.
Green screen is still everywhere, from television weather to YouTube explainers, because it is cheap and it works. LED volumes cost millions. A green sheet costs twenty dollars.
FAQ
Can I use a green screen with my phone?
Yes. Lock exposure and white balance, shoot at the highest quality setting, and keep the subject well away from the screen. CapCut, VEED and Clipchamp all key phone footage reasonably well. Expect rougher hair edges than a 10-bit camera would give you.
Why does my green screen key look blotchy?
Uneven lighting is the usual cause. Shadows, hot spots and wrinkles make parts of the screen a different green, and the keyer removes some patches but not others. Flatten the fabric, add a second light, and check the screen with a waveform before you record.
Does the screen have to be a specific shade of green?
Not exactly. Any saturated green that doesn’t appear on your subject will key. Chroma green, the bright lime shade sold as backdrop fabric and paint, is popular because it is far from skin tones and uncommon in clothing. Matte finish matters more than the precise hue.
Is it better to key in Premiere or After Effects?
Premiere’s Ultra Key is faster and fine for talking heads and simple backgrounds. After Effects’ Keylight gives you finer edge, spill and matte controls for difficult shots with hair, glass or motion blur. Many editors rough the key in Premiere and send only problem shots to After Effects.
How do I keep the background from showing through glasses or shiny objects?
Reflections of the screen pick up its colour and key out. Tilt lights and the subject slightly so the reflection catches something other than the screen, add a flag between the screen and the object, or mask the lens area separately and key it with a much tighter tolerance.
What free software gives the best chroma key?
DaVinci Resolve. The free version includes both the 3D Keyer on the colour page and the Delta Keyer in Fusion, and the quality matches paid tools. OBS Studio is the free choice for live streaming, and CapCut is the easiest free option for quick social clips.